Warning- GEBE rant

The experiments continue - hex bits

Well...the experiments continue. Although I haven't been working on bikes very long, I've already figured out that using my multi-tool:

attachment.php


to constantly remove and replace metric hex cap bolts (which are everywhere on bikes these days) sucks. I have been wondering for some time if someone makes hex BITS that a civilized person could put in a rachet or cordless screwdriver. Well... they do. At a local industrial hardware store I found a set of metric hex bits for $20:

attachment.php


If you can't find these locally, go to mcmaster.com and search on "hex bits", but by all means, get a set of these things if you work on bikes.

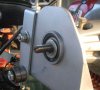
The next step was to get a cordless screwdriver so I could POWER off those bleeping bolts that I have put on and taken off about 8000 times while I've been experimenting with the GEBE mounting brackets. I have a few drills, but they are too heavy for every day use working on a bike.

My old cordless screwdriver, a cheap Black & Decker, actually lasted for 10 years of use and abuse before it finally gave up the ghost and died. It was buried with full honors. I even borrowed my neighbor kids' cap gun for a very quiet 21 snap salute. Everyone said it was a beautiful ceremony.

Based on a recc from Kevin Kelly, (http://www.kk.org/cooltools/archives/001284.php) I bought the Skil iXo Palm Cordless Screwdriver:

attachment.php


For $40 it's a little pricey, but it has some interesting features, including a reputed ability to hold a charge for 18 months. It also has LEDs on the front which is handy if you are screwing at night and want to avoid a collision with someone who is not paying attention and is screwing right at you from an oncoming direction (hang up and screw, self-absorbed,yuppie ********!)

It did have a charge when I took the thing out of the box, but I'm still thinking of returning it. It has 2 serious flaws:

1) It's very small and where your hand grips it you often accidentally press the button that controls the direction of the driver, which causes the driver to to stop.

2) It comes with trickle charger, so you leave it on the cradle and it will always be charged, but the charger is designed so that it has to lay flat; you can't hang it up on your wall or pegboard anywhere, and even when the charger cradle is flat, the driver doesn't make solid contact with the charging contacts, so it isn't charging.

I think I will return it and get another copy of the Black & Decker cordless screwdriver I had, which is $10 cheaper.

-Sam
 

Attachments

  • hex_bits.JPG
    hex_bits.JPG
    31.7 KB · Views: 848
  • skill_ixo.jpg
    skill_ixo.jpg
    17.4 KB · Views: 805
  • multi-tool.JPG
    multi-tool.JPG
    33.1 KB · Views: 814
Last edited by a moderator:
Next experiment - the GEBE brackets

The next experiment was on the GEBE main bracket. Because I did not know that GEBE sells wheels that are specifically designed for use with a motorized bike, I built a bleeping expensive wheel for this purpose:

1. Sun Rhyno Lite XL rim (welded and machined)
2. DT Swiss 14g stainless spokes.
3. DMR Revolver hub.

The DMR hub turned out to be another source of problems:
http://motoredbikes.com/attachment.php?attachmentid=231&stc=1&d=1186393405

I bought this hub because it is sold as a "bolt-on", and because it has a reputation for being indestructable. What I didn't know at the time is that there can be a difference between a "bolt-on" hub and a "solid axle" hub, which is really what GEBE recommends for the rear wheel.

The DMR hub is a bolt-on, hollow hub. It has machined cylindrical "projections" that are part of the main hub body. The bike dropouts rest directly on these projections, which is why the hub is so incredibly strong. It's a bolt-on hub because it uses two 6mm hex cap bolts to cinch it onto the dropouts. In addition to being pretty small, the engineers at DMR didn't design these bolts to be load bearing, since that's not how their design works. And that's one reason why I don't want to attach the main GEBE mounting bracket to my axle.

The other reason I don't want to mount the main GEBE bracket to my axle is that, I've already discovered that removing the rear wheel from a setup like this is a huge **** ** *** ******* ***. In fact, I'm amazed GEBE hasn't come up with a solution for this, although I frankly admit I'm still a GEBE/kit newbie and there might be a good reason.

1. The rear dropouts on my bike are a solid piece of 1/4" thick aluminum, as strong as anything on the bike. The bike came with 4 5mm drilled and tapped holes on these dropouts (2 on each side) which are designed to handle racks and the weight people put on racks. Even a Blackburn expedition rack is rated to hold 40 pounds (using 1 5mm bolt on each side) and many people tour with more than that.

2. The Robin/Subaru engine weighs about 15 pounds, with gas, and even with the bumps and vibration from an engine, I suspect the 4 5mm bolts will be strong enough to survive the load. We'll see I guess.

3. I'm putting heavy-duty (1/4" thick) homemade rubber washers pretty much everywhere I see a bolt near the engine, and my hope is that these washers will absorb a little bit of vibration from the engine and soften some of the stress on the supporting 5mm bolts.


Modifying the GEBE Main Bracket
-------------------------------

First I fabricated some simple brackets out of 3/16" steel. Eventually I'll probably paint these to prevent them from rusting. I put a thin piece of rubber between the bracket and the dropout, mainly to prevent the bracket from scratching the bike.

http://motoredbikes.com/attachment.php?attachmentid=236&stc=1&d=1186394241

My bracket moves the GEBE bracket "up" by 50mm. That makes fitting the GEBE belt on impossible, so I cut the GEBE bracket down by 50mm, after making very, very careful measurements.

The main GEBE bracket attaches to my bracket with a 3/8" carriage bolt, and I drilled a 3/8" hole in the main GEBE bracket to receive this bolt. There are a couple of good things about this design:
1. Even if you are attaching the GEBE main bracket to your axle, it makes life a lot easier to have a hole in the GEBE bracket, rather than that weird cutout they have. I have no idea whether the hole I drilled in their bracket will compromise the structural integrity of the bracket. I reckon we'll find out.

http://motoredbikes.com/attachment.php?attachmentid=237&stc=1&d=1186394241

With the hole in the GEBE main bracket, you can still easily remove the engine when you want to, but it doesn't fall off at inconvenient moments, like when you are futzing around with the bleeping wheel.

2. The bracket I made is attached with 2 bolts to the rear fork, so it can't move. But by attaching the GEBE bracket with a single 3/8" bolt, I can still move the GEBE motor back and forth a bit and get some adjustability when I'm putting on the GEBE stabilizer strap.


Modifying the GEBE Stabilizer Bracket
-------------------------------------
While I was in the neighborhood, I made a simple replacement out of 3/16" steel for the GEBE supplied stabilizer bracket. I attached this bracket to an existing braze-on with a 5mm hex cap bolt, a steel washer, and a 1/4" thick rubber washer.

http://motoredbikes.com/attachment.php?attachmentid=235&stc=1&d=1186393942
 

Attachments

  • stabilizer_bracket.JPG
    stabilizer_bracket.JPG
    138 KB · Views: 710
  • my_bracket.jpg
    my_bracket.jpg
    100.8 KB · Views: 727
  • modded_gebe_bracket_on_bike.jpg
    modded_gebe_bracket_on_bike.jpg
    102.8 KB · Views: 710
Last edited by a moderator:
Sam?, Your rant was unfair in my opinion. Your frustration took you over and you slandered a reputable dealer, GEBE. If,as you said you read and researched for the time you said you did, you would have been able to navigate the gebe site ad infinitum, ad nauseum!!! If you went to the expense of buying a premium kit from gebe also invest in a bicycle that it will fit. Lighten up, stop blaming others for your shortcomings and get the **** thing on the road. Have fun.
 
Sam,

The big pic at the bottom of your post, showing off the "art nuveaux" strap...

I'm looking at the belt. Have you got 1/4" clearance between the belt and tire?

Pix dark, roll it around while sitting on it, or have someone watch and make sure the belt misses after a 360 degree turn.

If it even touches a fraction, add a washer to the axle to push it out. That's where frays happen, not damaging, just unsightly.
 
showing off the "art nuveaux" strap...

Oh... a French guy could never make a strap like that.

I'm looking at the belt. Have you got 1/4" clearance between the belt and tire?

That'n more. But thanks for reminding me, because I forgot to check that!

Pix dark, roll it around while sitting on it...

I followed your instructions. The picture is STILL dark AND NOW MY MONITOR IS BROKEN!!! Thanks a lot...

If it even touches a fraction, add a washer to the axle to push it out. That's where frays happen, not damaging, just unsightly.

Mmmm... not following you. Do you mean put a washer on the engine drive shaft? Got any pics of this?

Thanks,

-Sam
 
There are 3 ways of moving the setup a smidgeon to get the belt to run in the center of the gear.

I've only added a washer to a driveshaft once. WARNING: the washer is "concave", take a felt pen and mark the outside of the existing washer (esp. when over 50 years old with fading eyesight), so when you add a second washer you match the "concaveness".

The best way to move on way or the other is adding a washer on the axle on the drivering/belt side of the equation.

The second best way is to have the leg of the axlemount on the sprocket/chain side of the equation go INSIDE the frame, rather than outside.

This new clutchless mount is going to be harder to get exact, especially if you don't have a bike repair stand.

For novices, you probably are going to have to do it a minimum of twice, and it is best to figure out a way to get the rear tire off the ground.

The middle picture is a prong of a garden tool fastened to a cabinet top in the shop. Until I bought my stand, thats how I did it.

Another way is if you have a 4x4 column, like the ones in my carport, screw in a large hook, high enough to get that wheel off the ground.

Before you crank it the first time, engage the tension arm and roll that back tire, make sure the spokering isn't hitting the frame, AND the belt doesn't rub on the tire.

Study the situation, and figure out if a washer added to the axle will get that belt cradled in the gear as centered as possible. 75% of the time, that will do it.

If you need to shove it "left" (it never needs shifting the other way, btw), having one leg outside the frame, and the other (chainside) INSIDE the frame's fork, that would be the most dramatic shove.

Third way, adding the washer, make sure on the concaveness AND make sure you tightnen the gear as snug as you can. The new Allen's slot makes that SO MUCH EASIER.

Hat tip to GEBE for that improvement.
 

Attachments

  • 2007_0326tricycle0001.JPG
    2007_0326tricycle0001.JPG
    54.4 KB · Views: 456
  • alum7assembly 015.jpg
    alum7assembly 015.jpg
    79 KB · Views: 448
  • 2007_0626newinstalls0034.JPG
    2007_0626newinstalls0034.JPG
    100 KB · Views: 425
And Sam & Hive,

Yesterday I looked in the GEBE website testimonial, hunting Starr's 35cc equivalent, see if I found a gas tank flipped (not).

However, I saw 2 of the "axlemount to framemount" conversions like Sam did, and one of a guy pushing the engine WAY back and putting a carryrack behind his seat, it had a brace like Hive built.

My modem hookup is dreadful, maybe you two could find those pic's/descriptions and add them to your threads. I saw spare tanks attached, Lobo has that hookup for a trailer.

We could start a new thread, maybe, of ways to add to the axle mount legs, blinkers and tanks and saddlebags and such.

I've never done any of those modifications, but think it would be very useful...

"GEBE Axle Mount modifications" is an easy enough title, and then link to Sam's photos/GEBE's testimonials.
 
Warning! Mostly Untested Concept!

attachment.php


Warning! I have not yet field tested this yet! I'm posting here as an FYI or to see if anyone else has tried this.

In addition to the challenges that Starrman has brought up about adding gas to the R/S 35 (also applies to the R/S 25), I've heard that changing the oil is also fun. The R/S manual recommends turning the engine upside down to change the oil, which is not impossible if you have bike rack, but you still need a way to cleanly transfer the oil.

My (mostly) untested concept is a drill powered fluid transfer pump from Dixieline. In fact, all of the parts are available at Dixieline or Home Depot. This pump is rated to move about 200 gallons per hour, which should be powerful enough to handle 8 ounces of motor oil. Since my bike is not up and running yet, I can't fully test this, but it worked ok on a bucket of water.

attachment.php


The vinyl tubing on the input is 1/2" OD, which is the diameter of the R/S 35 oil fill tube. The basic concept is: push the 1/2" tubing as far as possible into the oil tank, power on the drill and transfer the oil to an appropriate container.

If you have a bike stand, another possibility would be to find a brass fitting with 1/2" male thread on one side and a barb connector on the other. Thread the connector into the oil fill spout, put the output tube into a suitable container, spin the bike upside down and go have a cup of coffee.

A 3rd possibility would be to get a LiquaVac, which is a cheap plastic vacuum pump made specifically for removing oil, but I haven't been able to find one locally yet.

http://www.liquivac.com/
 

Attachments

  • _39912100_lost_in_space_pa.jpg
    _39912100_lost_in_space_pa.jpg
    12 KB · Views: 769
  • fluid_transfer_pump.JPG
    fluid_transfer_pump.JPG
    38.3 KB · Views: 805
Last edited by a moderator:
:cool:someone recommended using a basting syringe to suck the oil out of the sump.
you could also swedge down the vinyl tube input by sticking a smaller diameter tube with a tight fit, then into the sump.
 
Hey Sam, keep us posted on further developments/test results of your frame mount conversion... this is, imo, preferable for ease of fixing flats and maintenance of the rear wheel... keep up the good work.
 
Back
Top